Homeschool Organization
Homeschool Organization
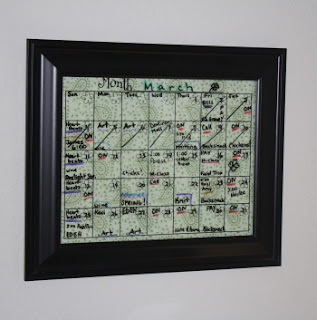
March 12, 2012 I recently purchased the cutest calendar on sale at
JoAnn’s. It was a glass frame with a pre-printed blank calendar, which
I could fill in with dry-erase markers.
I recently purchased the cutest calendar on sale at
JoAnn’s. It was a glass frame with a pre-printed blank calendar, which
I could fill in with dry-erase markers.The whole concept got me thinking…I’ve always wanted a chalkboard in my kitchen. I have several friends who have them, and I always notice their sweet messages.
However, I don’t like to shop, and I never saw a chalkboard when I was out.
This calendar gave me the idea to create my own. Here’s how I did it:
- I found an old frame in the basement. It’s about an 11 x 13 in, but you could use any size. This frame was already painted blue. I loved the color, but I didn’t like the color with the photo in it. So, it worked well for a re-purpose.
- I picked out a piece of muslin that I had lying around (also in the basement). I focused on light cloth without a pattern, so the message would be easy to read. Also, I chose the plain cloth, since I had such a colorful frame.
- I measured and cut the material to fit the back of the frame. This frame had a cardboard back that was once held in place with staples. I don’t have an industrial staple gun, so I just used heavy duty tape. It’s ugly, but no one ever sees it, since it sits against the wall.
- I put the material into the frame and taped the backing on.

Very simple do-it-yourself kind of craft!
I usually keep a bible verse on our dry erase board. (I tend to cut the message into a short segment for an easy memory verse.) Sometimes, I use the board for our to-do list, though, so I’m thinking of making another one for this purpose…maybe a self-standing frame I can keep on my dresser?? (I hate wasting paper, but I am definitely a list keeper!
Happy Homeschool Organization!


Comments
Post a Comment